Want to create a free blog? And you think that Blogger is the right option for you? so, follow this guide, we’ll show you the easy steps to start a free blog and make it look good and attractive.
With many options and tools, creating a free blog is easy and also free with BlogSpot, but sometimes, the Blogger management interface can be a little confusing for beginners.
For that reason, I’ll show you exactly in a step-by-step tutorial on how to create a free blog on Google’s Blogger platform which uses the domain name Blogspot.com for all the users.
So, without wasting your time, let’s get started:
How to create a free blog using Blogger
If you want a quick start instruction, then, I can resume everything as these steps
- visit the Google Blogger.com platform
- login with Gmail account
- Click the “create new blog” button
- Click on the “layout” from the left menu
- adjust the blog layout and header
- Click on “pages” and tell the world about yourself
- start your first blog post with the Posts menu
Now, for a comprehensive guide, follow these insurrections with screenshots and examples.
The first thing to do is type “blogger.com” in your web browser and you’ll get the official blogging platform by Google. It’s among the most popular and best free web hosting platforms that thousands of people are joining every month.
- Related: Gator website builder review
If you already have a Gmail account, you can log in with it, if it’s not the case, then, create a new one.
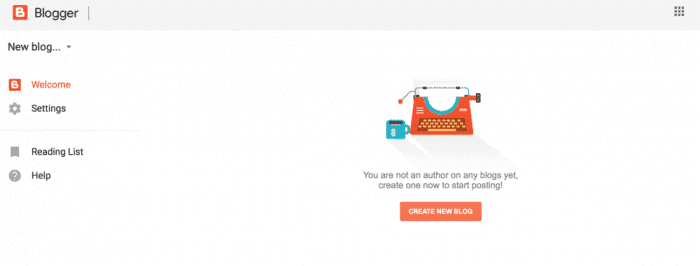
After you’ve logged in, you’ll see something like the following screenshot example. You need to click the “create new blog” orange button.
Give your free blog a unique name and address
On the next page, you’ll get the blog identity options and address.
Next, you can name your new blog and give it a unique address that people can access on the web. By default, The Google Blogger software lets you get a completely free domain address, well, it’s a sub-domain in reality but let’s name it domain for beginners.
That domain ends with Blogspot.com and that’s the main platform for all the bloggers there. Their blogs’ sub-domain ends with that URL.
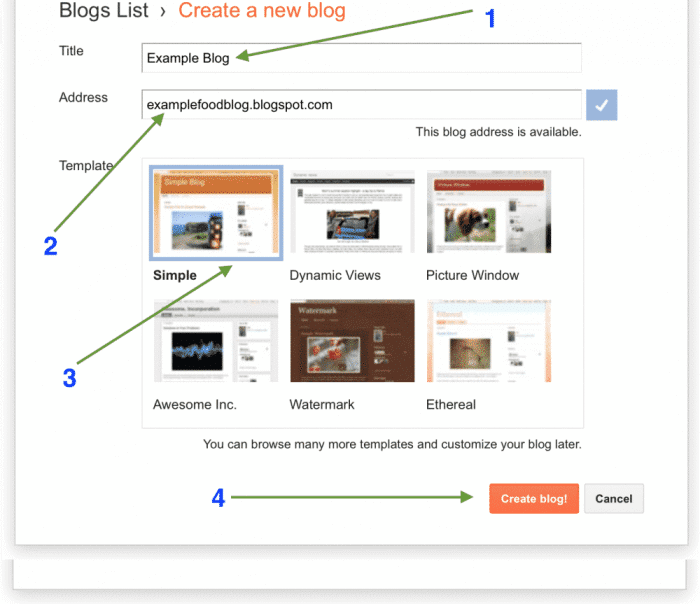
As you see in the above example, I used a simple blog title and address. Please take your blog domain name seriously. You should never use hyphens, numbers, and complicated characters and symbols. Here are the best domain name registration services.
You can do that by using a few words only and without any complicated characters. Since the majority of the Blogspot subdomains are already taken, you can play a little with adding words until you find your available Blogger address.
Don’t worry about the design, the default Google Blogger design looks very simple, and can add your own Blogger blog template later.
Adjusting your Blogger blog layout
This is not really a must-do step, but a great way to avoid getting an ugly web page design. You can choose how the blog will look and even you can customize the header, the Favicon, and so on. So, click the layout men from the left are on that Blogger.com page.
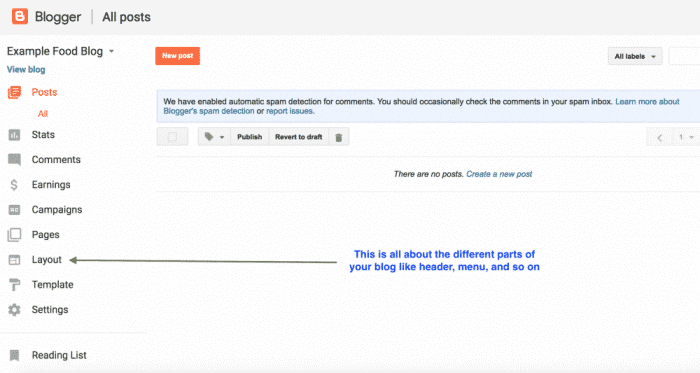
After that, you’ll get something like this page, where you can customize many things.
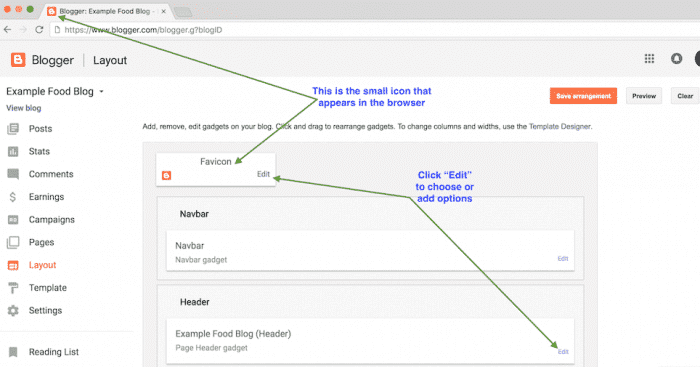
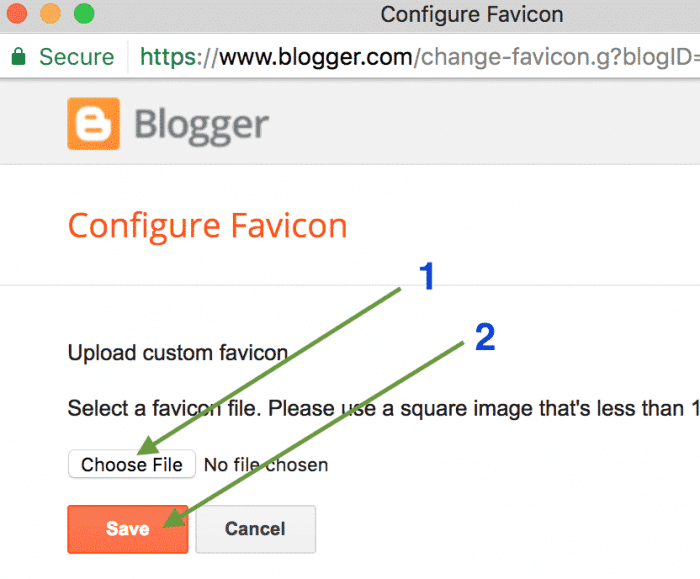
As you can see here, the Google Blogger dashboard comes with lots of options to edit your blog design layout and settings. When you click on Edit under the Favicon section, for example, you’ll get a pop-up window where you can upload your own blog Favicon.
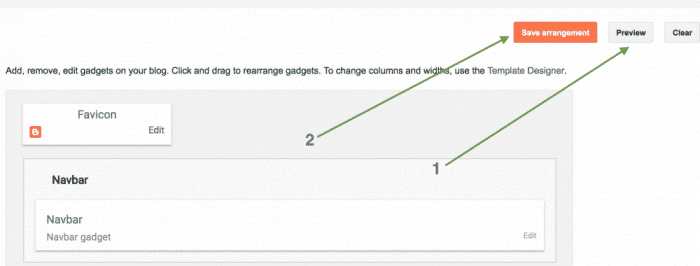
When you make changes to anything in your blog layout, make sure to click the “preview” option to verify the design, Then, you can save the changes, by clicking the “Save arrangement” button.
Creating the first page
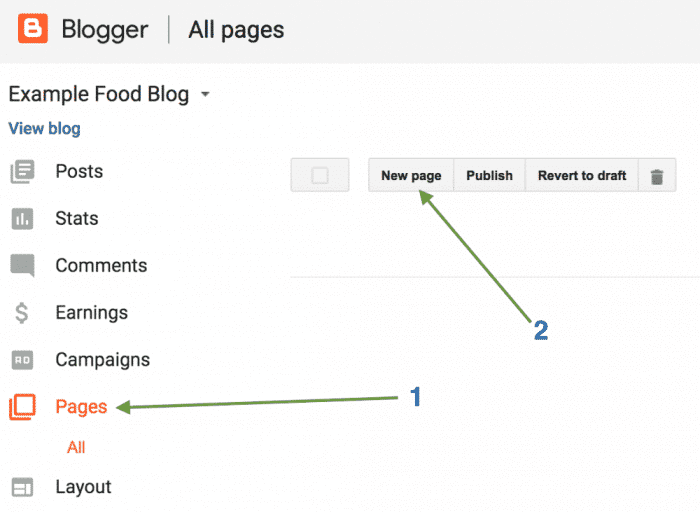
This is important, otherwise, you’ll lose lots of authority and benefits. You need to write something about yourself, your blog, and what the mission is. In a few paragraphs, you can easily attract the intention of search engines, by telling exactly what your blog will be talking about and who you’re.
To create a new blog page in Blogger, click “page”, and then, “new page”, here is how you can find the options in your dashboard.
Now, you get the Blogger’s page editor with options, you can use the Title section to write a comprehensive title for your blog page.
Make it clear, and easy to read. Then, start writing and adjust the text styling using the section highlighted in the following example. Also, you can preview the page before publishing it. That’s better to avoid mistakes.
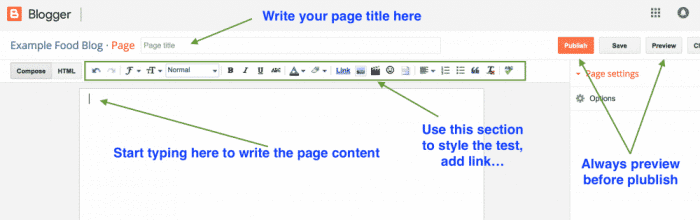
Now, publish the page by clicking the “publish” button and it’s done.
Start your first post
Now, that you’ve created a page telling the world about the next blog mission and about you also if you want, on another page, you can start blogging. Here is how, first, click the Blogger name to take you to the main dashboard.
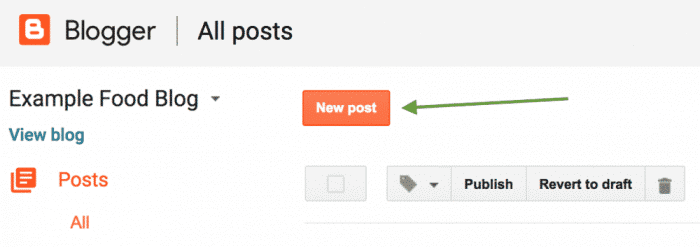
As the page example, in your Blogger post editor, you’ll get the same options, but with a few tools to customize the link as an example.
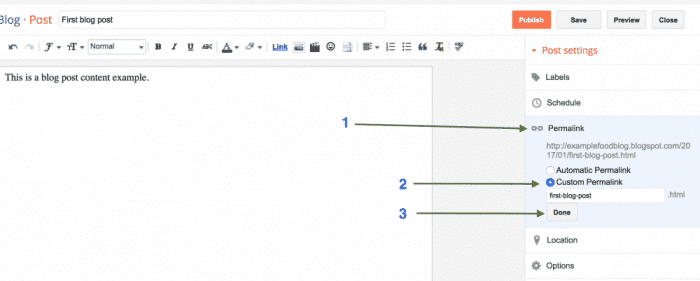
I highly recommend using a custom link structure for your blog. The default Blogger post permalink adds the month number and even date and makes the link a little confusing, especially when visitors find the post outdated.
So, first, start writing your blog post by creating separate paragraphs and adding a headline when appropriate to make reading easy. Then, add links by clicking the link icon above the post content area.
Now, it’s time to verify the post content, and then click the Publish button, visit your post link and you’ll see your first live blog post.
By following the above steps, now, you have the free blog and you can start building good posts and content.
Over time, you’ll get some traffic that increases, make sure to follow the Google webmaster guidelines and also the Google Blogger guidelines. Don’t use content from another website and just post on your blog. You need 100% original content to rank well in Google.
When you feel that you have a good number of posts, you can add a custom domain if you want and replace the free one. Also, you can move your blog to other blogging platforms like WordPress.
Now, if you feel that you can go professional and start a self-hosted blog, then, make sure you choose WordPress for that. It’s the right software to create any kind of website not only for blogging but also for eCommerce.
Of course, there is an option to monetize your blog, but please focus on content first. The monetization with Google Adsense will come with good revenue when you build lots of content.
You can check your blog stats from the dashboard and see how many visits it receives. Later, use the monetization tool and everything will be fine. I hope this comprehensive tutorial helped.